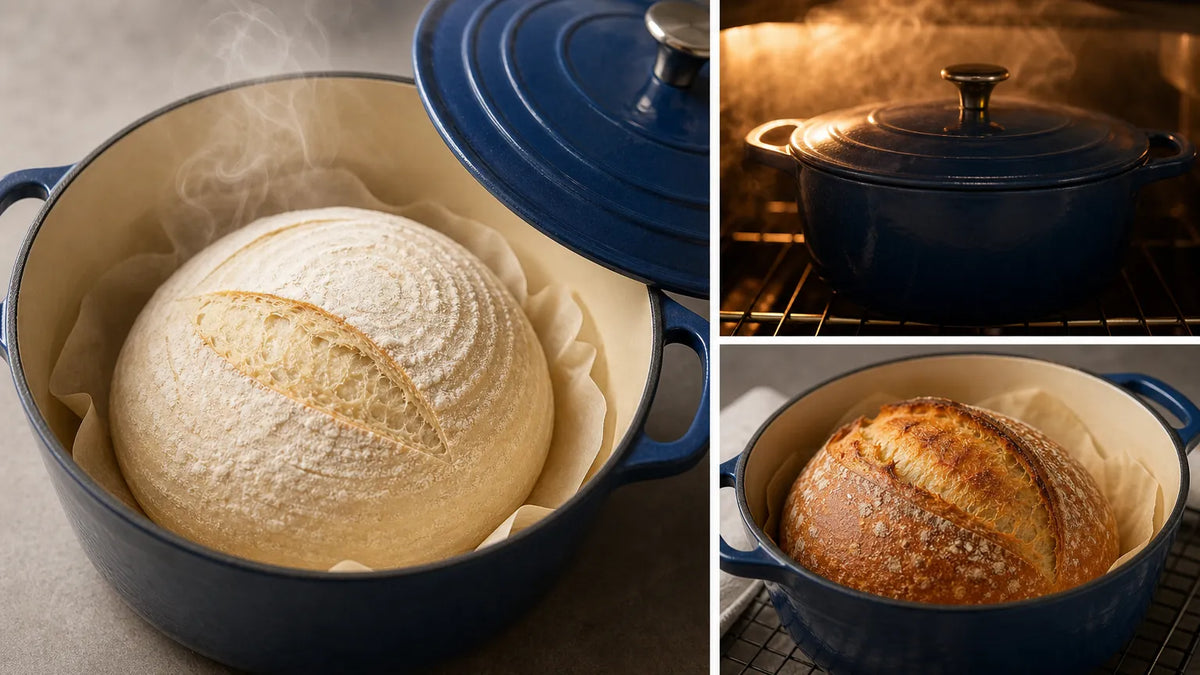
How to Bake Bakery-Style Sourdough Bread in a Dutch Oven
A crackling crust and an open, well-set crumb depend on more than a lively starter. During the first part of baking, the loaf needs moisture around its surface so the dough can expand before the crust hardens. A covered Dutch oven creates that small steam chamber with moisture released by the dough itself. Later, uncovering the loaf lets that moisture escape so the crust can brown and dry.
This guide explains how to use a stainless steel Dutch oven or a stainless-steel-based hybrid vessel without treating every pot, lid, or recipe as interchangeable. A reliable sourdough bread Dutch oven temperature guide combines the bread formula with the oven rating of the vessel, lid, knob, handles, and any liner. The steps below focus on controlled heating, steady steam retention, clean scoring, final browning, and complete cooling.
Why Use a Stainless Steel Dutch Oven for Bread?
A lidded pot gives sourdough a compact baking environment. The walls help moderate the oven’s heat around the loaf, while the close-fitting lid holds steam near the dough during oven spring. That steam delays the moment when the outer skin becomes rigid. The result can be better expansion, a more pronounced score, and a thinner crust that becomes crisp after the lid is removed. These benefits come from the covered baking method, not from stainless steel alone.
Compare Dutch Oven Construction
Material details still matter because stainless steel Dutch ovens are built in several ways. Some are single-material vessels, while others combine stainless steel with an aluminum core, a ceramic surface, or additional layers that influence heating and care. Bare stainless steel can require more oil and technique to reduce sticking, while a hybrid surface may make dough transfer and cleanup more manageable when used according to its care instructions. In every case, the manufacturer’s oven limit and preheating guidance should control how the pot is used.

Check Capacity and Loaf Clearance
Capacity and shape also affect fit. A medium Dutch oven may suit many boules, but the proofed dough needs clearance from both the sidewalls and the lid. A tall loaf that touches the lid can bake unevenly or restrict its expansion. For taller or larger boules, an 8 Qt Dutch Oven gives more headroom. Compare the proofing basket with the pot’s interior diameter and height, then allow room for oven spring. Capacity alone does not show how a wide or tall loaf will fit.
Consider a DELUXE Hybrid Option
One option to consider is the DELUXE 5.4 Qt Hybrid Dutch Oven, which includes a lid and combines a hybrid 304 stainless steel and ceramic nonstick surface with reinforced 304 stainless steel, an aluminum core, and a 430 magnetic stainless steel base. This layered construction is designed to distribute heat evenly and can make dough release and cleanup more manageable when used as directed. Compare the loaf size, recipe temperature, and product instructions before baking.
Use a Sourdough Bread Dutch Oven Temperature Guide
Sourdough recipes commonly specify oven settings in the neighborhood of 425°F to 450°F, yet there is no universal number. Flour blend, hydration, loaf size, altitude, desired crust color, and the oven itself all change the timing. Extension recipes also vary: the Colorado State University sourdough guide uses 450°F for its cast-iron method, while the Washington State University Breadlab preheats to 425°F for its own formula. Treat those figures as recipe examples, not automatic settings for a different vessel.
| Stage | Practical approach | What to verify |
|---|---|---|
| Preheat | Use the recipe temperature, often 425–450°F; do not automatically preheat an empty coated or hybrid pot. | The vessel maker permits empty preheating; every component is rated for the temperature and duration. |
| Covered phase | Bake with the approved lid only long enough to support oven spring and surface moisture. | Lid, knob, and handles have an explicit rating; the dough has enough headroom. |
| Browning phase | Remove the lid and continue until the crust reaches the color and doneness cues in the recipe. | The base remains within its time limit; exposed edges are not scorching. |
| Cooling | Move the loaf to a rack and allow the crumb to set before slicing. | Air can circulate beneath the loaf; the pot cools naturally before washing. |
Treat Maximum Ratings as Limits
A published maximum is a cookware limit rather than a target baking temperature. Select a tested recipe, compare its heat and duration with every component’s instructions, and use the lowest applicable limit. This check is especially important when the lid, knob, and vessel use different materials. Once the equipment and recipe align, note the successful oven setting and timing so the next loaf begins from a repeatable baseline.
Master Formula and Fermentation Baseline
To successfully execute this method, a reliable master formula helps anchor your technique.
Master Dough Formula
A standard artisan sourdough boule typically features:
- Flour: 500g total, such as 450g strong bread flour combined with 50g whole wheat or rye for depth of flavor.
- Hydration: 375g water, resulting in a manageable 75% hydration level.
- Inoculation: 100g active, bubbly sourdough starter, or 20% inoculation.
- Salt: 10g fine sea salt.
Hydration is calculated excluding the starter. True effective hydration is approximately 77%.
Fermentation Schedule
- Autolyse: Mix flour and water together and rest for 45 minutes to develop gluten structure naturally.
- Bulk Fermentation: Incorporate the starter and salt. Perform 3 to 4 sets of stretch-and-folds spaced 30 minutes apart during the first 2 hours. Allow bulk fermentation to continue at ambient room temperature, approximately 74°F–78°F, until the dough increases by 50% to 75% in volume, shows visible doming, and has bubbly gas pockets around the edges. At 74°F–78°F with 20% inoculation, expect bulk fermentation to take 4–6 hours total. Use dough behavior, not the clock, as your guide.
- Shaping & Cold Retard: Shape the dough into a tight boule, place it seam-side up into a floured banneton, and cold-retard it overnight in the refrigerator for 12 to 16 hours. This slow fermentation deepens flavor and firms up the outer skin for clean, precise scoring.
- Preheat your oven and Dutch oven according to your cookware’s manufacturer guidelines, or use a cold-vessel method if empty preheating is restricted. Score the cold dough, bake covered for 20 minutes, followed by uncovered at 450°F for 20–25 minutes until deep brown. Internal temp should reach 205–210°F. Cool on a wire rack for at least 1 hour before slicing.
Preheat Your Oven-Safe Cookware Correctly
Separate Oven and Vessel Preheating
Preheating the oven is essential because the loaf needs predictable heat from the moment baking begins. Empty-pot preheating is a separate decision. Many cast-iron bread methods heat the vessel with the oven, but that practice should not be transferred automatically to ceramic-coated or hybrid oven-safe cookware. King Arthur Baking’s sourdough tips likewise advise checking the manufacturer before empty-preheating a non-cast-iron vessel. Matching the method to the cookware helps maintain consistent results from loaf to loaf.
Use a Cold-Vessel Method
If a manufacturer-approved empty preheat is unavailable, use a cold-vessel method: preheat the oven, prepare and score the dough, place it in the room-temperature pot, fit an appropriately rated lid, and transfer the assembled vessel to the oven. Follow a recipe designed or adjusted for that approach, since timing may differ from a preheated cast-iron method. This avoids assuming that “oven safe cookware” also means “approved for empty preheating.”
Prevent Thermal Shock
Before baking, read the cookware use and care instructions. Use dry oven mitts, keep the vessel centered on a stable rack, and avoid setting a hot pan on a wet or cold surface. After baking, let it cool naturally. Sudden temperature changes and cold water on hot cookware can stress the materials and finish.
Place the Dough Into the Best Pots for Steam Retention
Choose the Right Size and Lid
The best pots for this method are not simply the heaviest or deepest options. Look for a vessel that is correctly sized for the loaf, has a lid that closes without contacting the dough, offers secure handles, and carries clear oven ratings for every component. A close-fitting lid helps retain the dough’s own steam, but the fit does not need to be hermetic. Safe handling and adequate headroom are more important than forcing the largest possible loaf into the pot.
Transfer the Dough Safely
Turn the proofed dough onto parchment or a lightly prepared work surface according to the recipe. If using parchment as a sling, check its temperature rating and trim excessive overhang so paper stays away from heating elements. Lower the dough gently rather than dropping it. A rough impact can deflate gas pockets, distort the score, or bring the dough into contact with the hot walls. Keep fingers clear of the rim and use two hands on the handles.
Center and Cover the Loaf
Centering matters. An off-center boule may expand toward one side and brown unevenly. Once the dough is positioned, put the verified lid on promptly so the surface does not dry while the oven door is open. The pot creates steam from the loaf’s moisture; adding ice or pouring water into hybrid cookware is unnecessary unless the cookware maker and recipe expressly permit it. Water added to a hot vessel can create hazardous steam and thermal shock.

Score the Surface to Control the Bread’s Expansion
Make the Primary Expansion Score
Scoring creates an intentional weak point where expanding dough can open. Without it, pressure may rupture the loaf at its side or base. Use a clean, sharp lame or razor and make one decisive primary cut immediately before loading. The exact pattern depends on dough strength and loaf shape. The Colorado State University Extension sourdough guide gives an example of slashes about 1/2 inch deep for its formula, while other recipes may call for a shallower cut. Follow the depth tested for your dough rather than treating one measurement as universal.
Adjust the Blade Angle
For a prominent ear, bakers often hold the blade at a low angle to the surface instead of cutting straight down. Decorative cuts should be shallower than the main expansion score so they do not compete with it. Work quickly but calmly: repeated sawing can drag the dough and seal parts of the opening. If the dough has become very soft, brief refrigeration before scoring may make the surface easier to handle, provided the recipe allows it.
Remove the Lid for the Final Browning Phase
Remove the Lid Safely
The covered phase supports expansion; the uncovered phase builds color and dries the crust. When the recipe’s covered interval ends, open the oven carefully and lift the lid away from your face so trapped steam escapes in the opposite direction. Set the hot lid on a dry, heat-resistant surface. Continue baking uncovered until the loaf matches the recipe’s visual and temperature cues rather than relying only on the clock.
This two-stage method is central to how to get crispy crust bread with Dutch oven baking. King Arthur Baking’s sourdough guidance describes covered baking followed by lid removal so the loaf can finish browning. The Colorado State University recipe similarly suggests removing the lid near the end when a darker, crustier loaf is desired. The precise covered and uncovered times differ among formulas, pot materials, and ovens.
Control Bottom Browning
Watch the base as well as the top. If the bottom darkens too quickly, moving the rack one level higher or placing a separate sheet pan on a lower rack can reduce direct radiant heat without insulating the Dutch oven itself. Do not insert unapproved materials between the loaf and the cooking surface. A deeply colored crust can be desirable, but blackened edges or a burnt base indicate that the temperature, rack position, or timing needs adjustment.
Cool the Loaf on a Rack to Preserve the Texture
Cool the Loaf Completely
A finished loaf continues changing after it leaves the oven. Steam migrates through the crumb and escapes through the crust, while the interior structure firms. Leaving bread in the Dutch oven traps moisture around the base and can soften the crust. Transfer the loaf to a wire rack as soon as it is safe to handle, then let air circulate on every side.
Cooling time depends on loaf size and hydration. The Colorado State University guide advises cooling its loaves completely—about three hours—before cutting. Some recipes call for a shorter rest, but the principle is the same: slicing into a warm loaf releases steam and may leave a gummy or compressed crumb. Wait until the loaf no longer feels warm at its center before cutting.
Store the Cooled Loaf
For short-term storage, let the bread become fully cool before covering it. Trapping residual warmth encourages condensation, which quickly softens a crisp crust. Store cut-side down on a board for same-day use or use a breathable bread bag for a little longer. For extended storage, slice and freeze the cooled loaf. Reheating can refresh the crust, but use moderate conditions appropriate for the bread and the cookware.

Conclusion: Baking Sourdough Bread in a Dutch Oven
Bakery-style sourdough comes from managing steam, expansion, browning, and cooling as a sequence. Start with a tested recipe, choose a correctly sized lidded vessel, verify the rating of every component, load and score the dough carefully, uncover it for the final color, and cool it on a rack before slicing. A stainless steel Dutch oven can support this method when its construction, capacity, and care instructions match the recipe.
If a layered stainless-steel-based design suits your kitchen, the DELUXE 5.4 Qt Hybrid Dutch Oven offers a practical option for a range of covered and uncovered recipes. Review the product instructions alongside your sourdough formula, then record the dough weight, oven setting, covered time, uncovered time, and cooling period after each bake. Small adjustments based on one variable at a time can make future results more repeatable.
FAQs About Sourdough Bread Dutch Oven Baking
Q1. Can I bake sourdough in any stainless steel Dutch oven?
Only if the vessel, lid, knob, and handles are all rated for the recipe’s temperature and duration. Also check capacity, headroom, and whether the manufacturer permits empty preheating. “Stainless steel” describes a broad category, not one universal construction.
Q2. What temperature should I use for sourdough in a Dutch oven?
Use the temperature in a tested recipe, then confirm it stays below the lowest rating of every cookware component. Many recipes fall around 425°F to 450°F, but loaf size, formula, altitude, and oven behavior can require different settings.
Q3. Do I have to preheat the Dutch oven?
No. Preheated-pot and cold-vessel methods both exist. Empty-preheat only when the manufacturer expressly permits it; otherwise, preheat the oven and use a recipe suited to loading the dough into a room-temperature vessel.
Q4. Can I use parchment paper inside the pot?
Parchment can simplify transfer and reduce sticking, but it must be rated for the chosen temperature. Trim long edges, keep paper away from heating elements, and never substitute waxed paper.
Q5. Why did my crust become soft after baking?
The loaf may have cooled in the pot, been sliced too soon, or been covered while still warm. Move it to a rack promptly, allow the crumb to set fully, and avoid trapping condensation during storage.